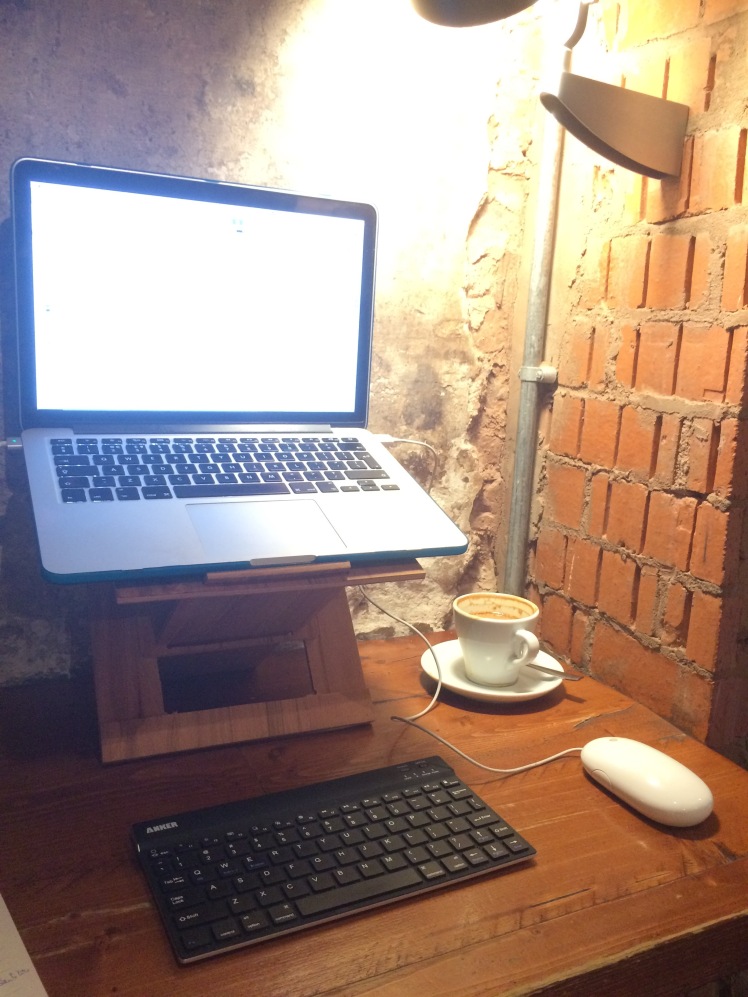
One of my favorite projects so far is actually quite easy to make – an ultra portable stand-up desk for my laptop. It’s super quick to assemble and is helping me prevent head- and backaches from scrunching over my laptop all the time.
I’d been looking for something like this for quite some time, but everything I could find online was usually prohibitively expensive and not really that portable. The cheapest I found started at $70, but usually they go well into the hundreds. This one here is based on a mechanism I saw on a Kickstarter project called Flio, which I couldn’t afford on my PhD budget.
The materials for this project cost me €3.60 for a piece of wood that I got in the local DIY store out of the scrap wood bin. I could probably built a second one out of the same piece, so you definitely get your money’s worth with this little project. It works for 13″ and 15″ laptops equally well. For a youtube demonstration click here.
Tools I used:
- Bosch PST 700 E Jigsaw (currently on offer on Amazon! I love this thing!)
- Bosch drill (any will do)
- Gorilla Wood Glue
See the “Tools & Stuff” Section for more info on any Tools and Websites I use.
Materials:
- Birch Plywood sheet – 0.5cm thick (€3.60)
- Ribbon (any colour)
- Walnut or Linseed oil (optional finish – ca. €2)
I assume that with a bit of elbow grease one could probably rebuild this project with a simple handsaw. The wood needs to be at least 0.5cm thick for stability, so it might take a while. If you can get your hands on electric tools all the better. Many places nowadays offer ‘Tool Libraries’ were you can rent tools for short periods of time.
Getting Started:
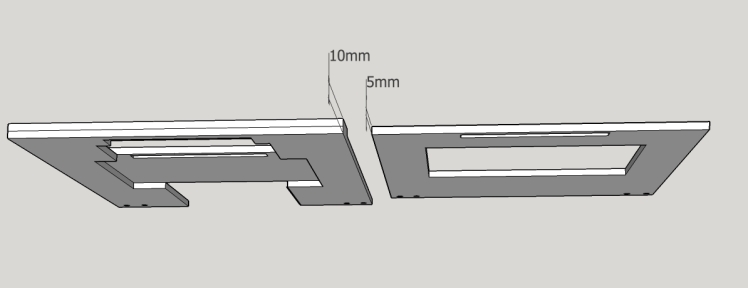
Below you can see the plan I created with SketchUp. The two boards on the left show the way they need to be cut, the two on the right show how the cuts need to be assembled.
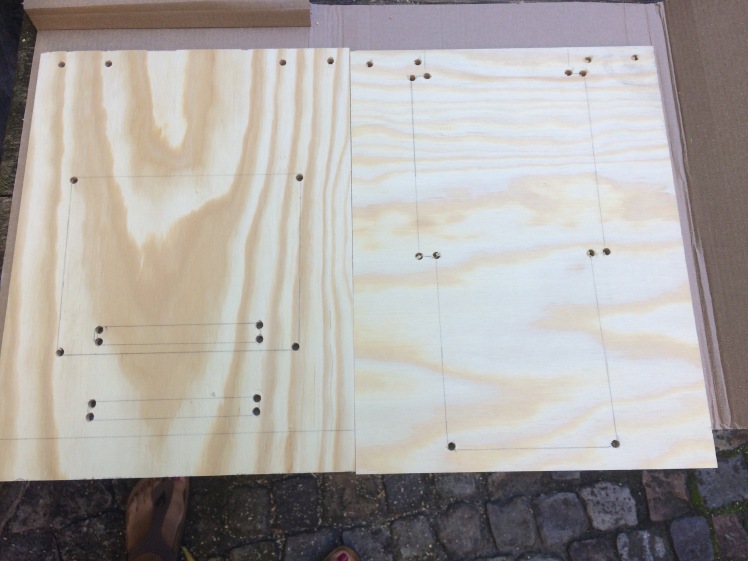
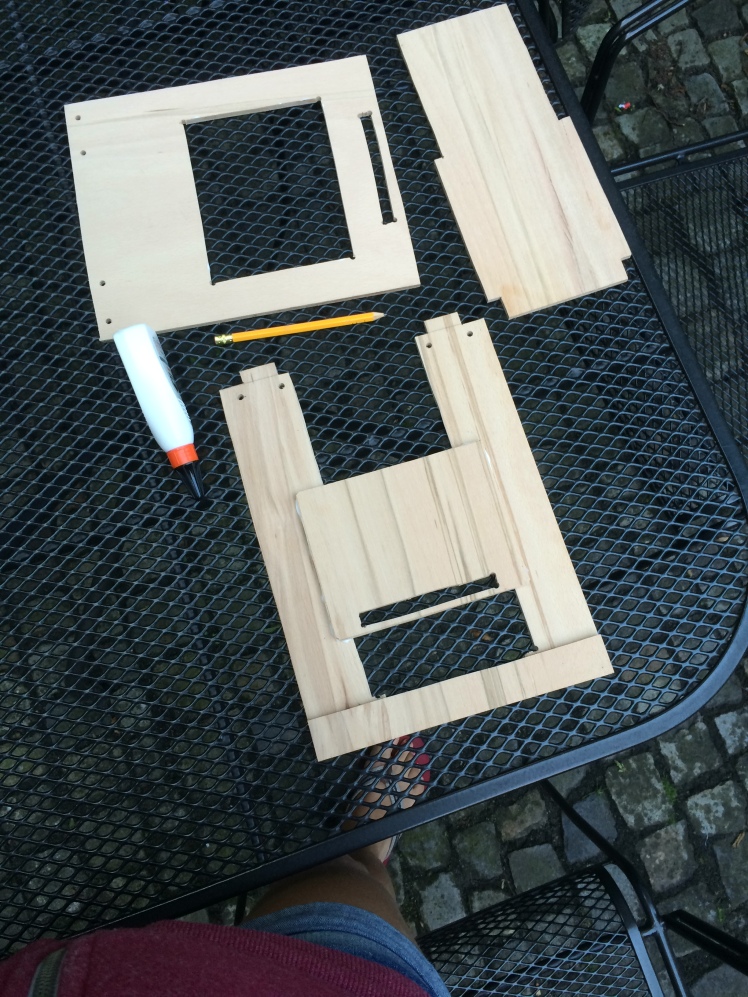
Start off by drawing the pieces onto your plywood board as seen below. You will need two rectangles first (300mmx225mm) – pieces A and B in the plan below.
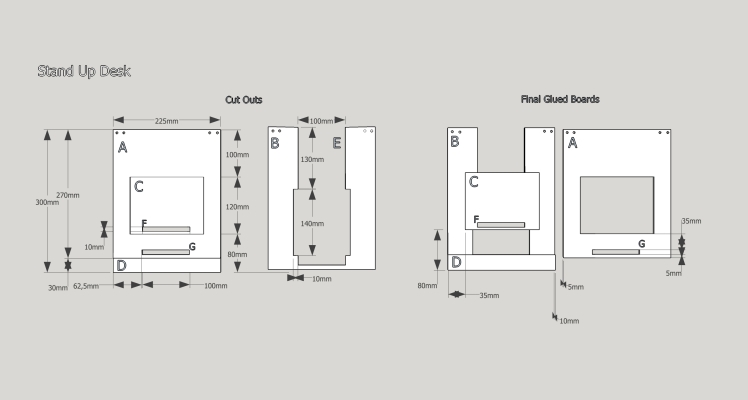
Within piece A, you then draw on pieces C,F,G and D. To be able to cut-out these pieces you will need to drill holes into the corners of pieces C, F and G. In addition, you also need two holes in each of the top corners of pieces A and B. They should be roughly 5mm away from the edge and 10mm apart from each other, but they need (!) to be at the same spot on both sheet A and B!
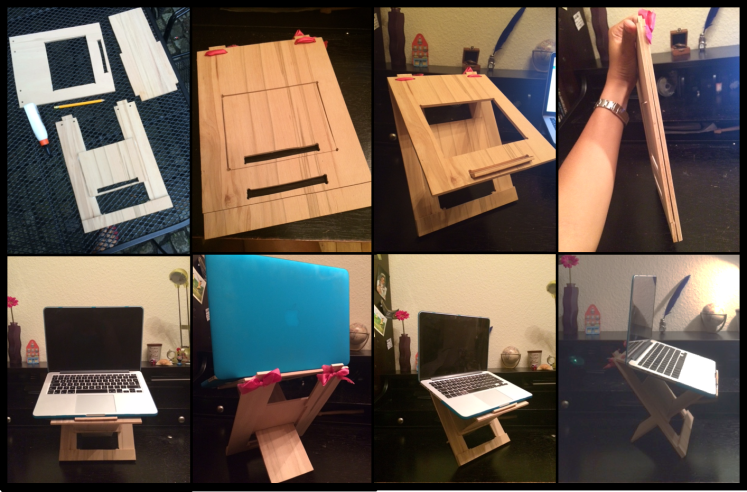
UPDATE: A small update on piece E after having build a few more of these for friends – it’s better if you turn piece E around, as in having the broader end at the top. This way you actually get two “settings,” one for the laptop and one for a book or tablet! You can see this on the photo here:
Once you have done that, cut off piece D in a straight line and keep it.
Cut-out pieces F and G, so that you have two even holes (10mmx100mm). You can discard these small pieces, we just need the holes.
Now you cut out piece C (120mmx155mm) and keep it.
Moving on to piece B, we need to drill holes into the corners of piece E. Then we can cut it out as well and keep it!
Assemble:
Now we need to align the pieces to fit together as seen on the right of the plan above. Basically you re-insert pieces C and D into piece A and lie this on top of piece B. Now, using your Gorilla Glue, you glue pieces C and D onto piece B.
Once it is dry you need to be able to fit piece A snugly onto piece B, so make sure everything is aligned before you start glueing! I’ve used Gorilla Glue for several projects and believe me it’s rock solid once it’s set.

Once you have waited long enough, the only thing left to do is take your two pieces of ribbon and bind the two boards together through the holes you made in the top corners. Make sure that, when you tie it up, you still have enough leeway so that you top board (A) is able to swing upwards a bit.
To assemble, you can now simple take piece E, stick the long edge through hole F and the short edge through hole G (see video below for demonstration).
Finishing:
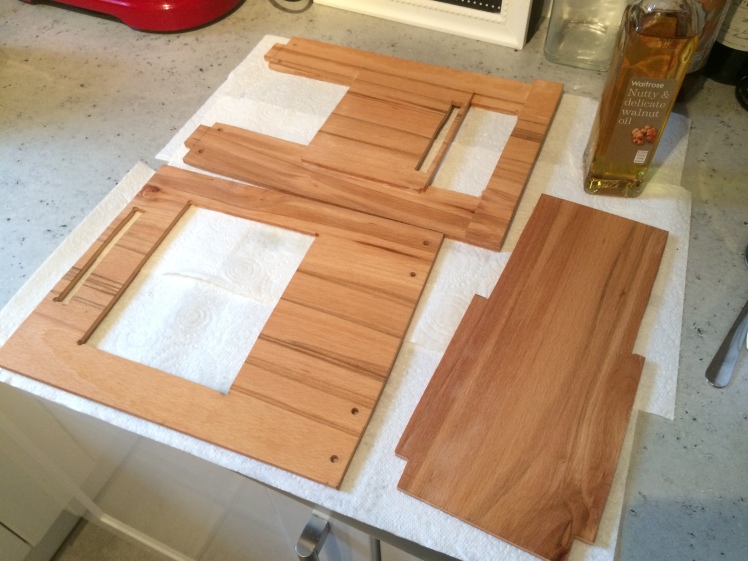
Since I am going to use this baby quite a lot, I decided that I wanted to better protect the wood from moisture and the environment in general. To do that I used simple Walnut Oil, which you can buy in most supermarkets nowadays. Simply take the oil, drop it onto the wood and rub it in using a lint-free cloth. For items that are not going to be used for food, I would put on three coatings at least 24h apart. Please bear in mind though that Walnut Oil can cause allergic reactions for those who are allergic to nuts – if you are allergic try using Linseed Oil instead!
Check Out my Youtube Demonstration here to see how it works! The hole in piece A ensures good air flow to prevent the laptop from overheating! Happy Working!